For years, seasoned WordPress developers have faced a frustrating barrier. You know PHP inside and out, you’ve mastered themes and custom plugins, but the moment you wanted to build a native custom block for the Gutenberg editor, you hit a wall. Suddenly, you were forced to navigate JavaScript, React, Node.js, Webpack, and JSX. Building a simple server-rendered block felt like using a sledgehammer to crack a nut.
With the release of WordPress 7.0, that era is officially over.
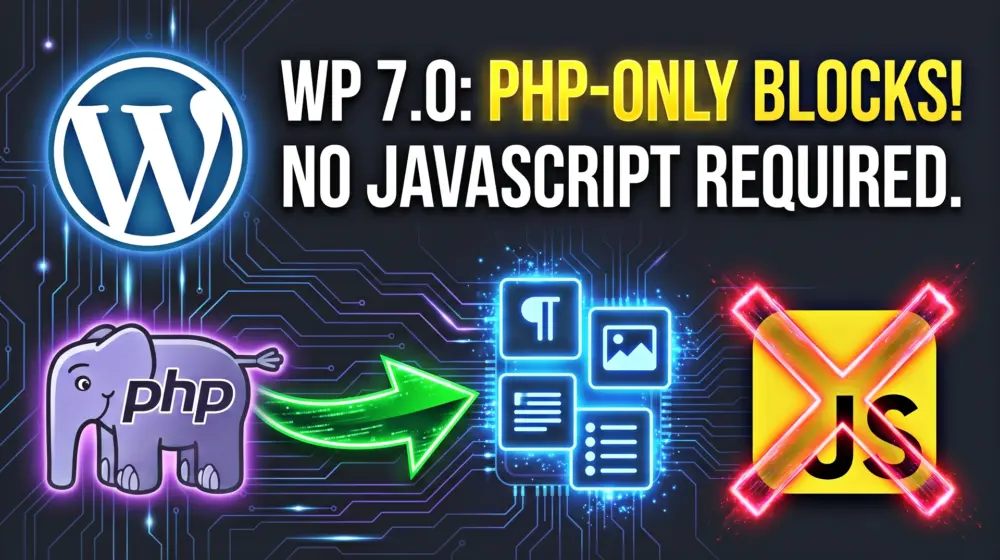
The Ultimate Guide to WordPress 7.0 PHP-Only Block Registration
WordPress 7.0 introduces PHP-only block registration, a revolutionary feature that allows you to build, register, and deploy fully functional native blocks using absolutely zero JavaScript. It’s a massive win for server-side developers, offering a streamlined workflow that bypasses the build step entirely.
In this comprehensive, expert-level guide, we will explore everything you need to know about PHP-only block registration in WordPress 7.0. We will cover how to build them, how to debug common gotchas, when to use them, and how to ensure they meet modern accessibility (WCAG 2.2) and SEO standards.
What is a PHP-Only Block in WordPress 7.0?
A PHP-only block is a custom Gutenberg block created entirely on the server side without a
block.jsonfile, JavaScript build processes, or React. By passing the'autoRegister' => trueflag into the standardregister_block_type()PHP function, WordPress automatically renders the block in the editor using theServerSideRenderAPI and auto-generates the Inspector Controls (sidebar UI) based on your declared attributes.
The Evolution of Block Development: Why PHP-Only Matters
Since Gutenberg launched in WordPress 5.0, the core philosophy has been highly interactive, client-side rendering. While powerful, this approach alienated a massive segment of the WordPress developer community.
If you wanted to build a pricing table that pulled live data from your database, or a simple call-to-action (CTA) banner, you had two choices:
- Spend hours setting up an
npmenvironment, creating anedit.jsfile, and wiring up REST API endpoints to fetch data. - Fall back on the classic WordPress shortcode and sacrifice the visual editing experience.
Enter WordPress 7.0.
The Core team recognized that not every block needs to be a highly interactive, drag-and-drop JavaScript application. Many blocks simply need to accept a few settings from the sidebar and render server-side data. The new PHP-only block registration bridges this gap perfectly. It acts as a natural migration path for legacy shortcodes, allowing you to wrap existing PHP logic in a modern editor wrapper seamlessly.
The Core Benefits:
- Zero Build Tooling: Say goodbye to
npm run buildandwebpack.config.js. - Faster Prototyping: Go from concept to working block in minutes using a single
.phpfile. - Native Integration: Fully supports Gutenberg’s native Block Supports (Color, Spacing, Typography) natively.
- Lower Barrier to Entry: Brings classic backend WordPress developers back to the forefront of block theme development.
How it Works Under the Hood
Before we write code, it is critical to understand the architecture. How does WordPress magically create a React-based UI in the editor from a PHP file?
It boils down to the autoRegister flag.
When you call register_block_type() in your functions.php or plugin file and include 'autoRegister' => true inside the supports array, WordPress intercepts this.
- The server passes the block’s metadata (attributes, icon, title) to a JavaScript global variable (
autoRegisterBlocks) loaded in the editor. - The block editor reads this global variable and dynamically scaffolds a standard block interface.
- It uses a built-in React component called
ServerSideRenderto display your block. - When a user changes an attribute in the sidebar, the editor fires a REST API request to the server, which runs your PHP
render_callbackand updates the preview instantly.
It is a beautiful loop: Change Setting → REST API Call → PHP Render → Editor Update.
Step-by-Step Development Guide: Building Your First Block
Let’s get our hands dirty. We are going to build a dynamic "Author Spotlight" block. This block will take a custom name, a bio, and a layout alignment, and render it securely on the frontend.
Step 1: Hook into init
Like all good WordPress registrations, we start by hooking into the init action. You can place this in your custom plugin or your theme's functions.php.
PHP
<?php
/**
 * Plugin Name: My First PHP Block
 * Description: A zero-JS block for WordPress 7.0.
 */

// Hook into the initialization phase
add_action( 'init', 'ws55_register_author_spotlight_block' );

function ws55_register_author_spotlight_block() {
    // Block registration logic goes here
}
Step 2: The register_block_type Array
Inside our function, we define the block. Notice that we are passing an array directly, rather than referencing a block.json file path.
PHP
function ws55_register_author_spotlight_block() {
    register_block_type( 'ws55/author-spotlight', array(
        'api_version'     => 3,
        'title'           => __( 'Author Spotlight', 'ws55' ),
        'description'     => __( 'Display a stylish author bio.', 'ws55' ),
        'category'        => 'widgets',
        'icon'            => 'admin-users',

        // This is the magic flag for WP 7.0
        'supports'        => array(
            'autoRegister' => true,
        ),

        // Defining the data we want to collect
        'attributes'      => array(
            'authorName' => array(
                'type'    => 'string',
                'default' => 'John Doe',
            ),
            'showBio'    => array(
                'type'    => 'boolean',
                'default' => true,
            ),
            'layoutType' => array(
                'type'    => 'string',
                'enum'    => array( 'minimal', 'card', 'featured' ),
                'default' => 'card',
            )
        ),

        // The PHP function that outputs the HTML
        'render_callback' => 'ws55_render_author_spotlight_block',
    ) );
}
Step 3: The Render Callback Function
The render_callback is where your traditional PHP skills shine. It receives the parsed attributes and outputs the final HTML.
A critical component here is get_block_wrapper_attributes(). You must include this on the outermost HTML element of your block. It injects the necessary CSS classes, IDs, and inline styles generated by Gutenberg. Without it, your block will break the editor's styling engine.
PHP
function ws55_render_author_spotlight_block( $attributes, $content ) {
    // Extract attributes safely
    $author_name = isset( $attributes['authorName'] ) ? $attributes['authorName'] : '';
    $show_bio    = isset( $attributes['showBio'] ) ? $attributes['showBio'] : false;
    $layout      = isset( $attributes['layoutType'] ) ? $attributes['layoutType'] : 'card';

    // Get the dynamic wrapper attributes generated by WP Core
    // We can also merge our own custom CSS classes into it
    $wrapper_attributes = get_block_wrapper_attributes( array(
        'class' => 'ws55-author-layout-' . esc_attr( $layout )
    ) );

    // Start output buffering
    ob_start();
    ?>
    <div <?php echo wp_kses_data( $wrapper_attributes ); ?>>
        <h3 class="ws55-author-title">
            <?php echo esc_html( $author_name ); ?>
        </h3>

        <?php if ( $show_bio ) : ?>
            <p class="ws55-author-bio">
                <?php esc_html_e( 'This is a dynamic bio pulled from the server.', 'ws55' ); ?>
            </p>
        <?php endif; ?>
    </div>
    <?php
    // Return the clean HTML
    return ob_get_clean();
}
Activate your plugin, go to the Block Editor, and search for "Author Spotlight". You will find your block fully rendered. When you click on it, the right-hand Inspector sidebar will automatically contain a text field for the name, a toggle switch for the bio, and a dropdown for the layout. No JS required!
Deep Dive: Attributes and Auto-Generated UI
The true brilliance of PHP-only blocks lies in how WordPress translates your backend PHP array into a frontend React user interface. It does this by mapping the type of each attribute to a specific UI control component.
Currently, the auto-generation system supports four specific data types. If you use one of these, WordPress handles the UI for you:
string: Generates a standard text input field (TextControl). Perfect for headings, URLs, or small text snippets.integer/number: Generates a number input field (NumberControl). Ideal for setting grid columns, limits on query loops, or pixel values.boolean: Generates an ON/OFF toggle switch (ToggleControl). Use this to show/hide specific elements within your block.enum: Generates a dropdown select menu (SelectControl). You must provide an array of allowed strings. This is perfect for styling variants (e.g., "Primary", "Secondary", "Dark Mode").
What is Not Supported?
Because the UI is generated automatically, it lacks the nuance of custom JS. You cannot currently generate:
- RichText editors (for bold/italic inline editing).
- Media upload buttons (for selecting images from the media library).
- InnerBlocks (you cannot nest other blocks inside a PHP-only block).
If your block requires the user to upload a photo directly inside the block canvas, you still need to graduate to a full JavaScript block build.
Leveraging Native Block Supports for Styling
You do not need to write custom CSS for margins, padding, or typography. WordPress 7.0 allows PHP-only blocks to opt into the core Block Supports system.
By expanding the supports array in your registration function, you can unlock native color pickers and spacing sliders in the sidebar.
PHP
'supports' => array(
    'autoRegister' => true,
    'color'        => array(
        'background' => true,
        'text'       => true,
        'link'       => true,
    ),
    'spacing'      => array(
        'margin'  => true,
        'padding' => true,
    ),
    'typography'   => array(
        'fontSize'   => true,
        'lineHeight' => true,
    )
),
When a user selects a background color or tweaks the padding, WordPress saves this data. Remember that get_block_wrapper_attributes() function we used earlier? It catches these settings and automatically applies the correct has-background-color CSS classes or inline style tags to your block’s wrapper <div>.
Debugging and Critical Gotchas
While the API is elegant, there are a few sharp edges that will frustrate experienced developers if they aren't prepared.
Gotcha #1: The style Naming Collision Error
This is the most common issue developers face. When you enable visual block supports (like colors or spacing), WordPress automatically creates an invisible, reserved attribute named style to store those CSS values.
If you try to create your own custom attribute called style (for example, to let a user pick between a "modern" or "classic" style), the REST API will throw a fatal error: Error loading block: Invalid parameter(s): attributes.
The Fix: Never name your attributes style. Use layoutStyle, variant, or designMode instead.
Gotcha #2: Editor Stylesheet Syncing
If your block relies on a custom CSS file, you might notice the styles look great on the frontend but are broken in the editor. PHP-only blocks rely heavily on the ServerSideRender component, which sometimes struggles to enqueue assets locally in the editor iframe if they aren't registered properly.
The Fix: Ensure you register your asset handles before you call register_block_type, and explicitly link them in your array.
PHP
wp_register_style(
    'ws55-author-style',
    plugins_url( 'style.css', __FILE__ )
);

register_block_type( 'ws55/author-spotlight', array(
    // ... metadata ...
    'style' => 'ws55-author-style', // This ensures it loads in the editor
) );
Gotcha #3: Performance Overhead
Because the editor relies on REST API calls to render the block every time an attribute is changed, highly complex database queries inside your render_callback will make the editor feel sluggish. If your block fetches 10,000 WooCommerce products, do not run that query on every keystroke.
The Fix: Use WordPress transients to cache the output of heavy operations inside your render function, ensuring a snappy editor experience.
Usage and SEO Optimization Strategy
As a professional web designer or SEO specialist, you must deploy the right tools for the right job. PHP-only blocks are not a blanket replacement for React blocks; they are a specialized tool.
When to Use PHP-Only Blocks:
- Server-Driven Data: Displaying dynamic content like "Latest Posts," "Top Rated Products," or user-specific dashboards.
- API Integrations: Fetching live data from third-party APIs (e.g., live stock tickers or weather widgets) where exposing API keys in client-side JS is a security risk.
- Shortcode Replacements: Modernizing old plugin architectures. If you have
[my_custom_form], wrapping it in a PHP-only block provides a massively improved user experience.
Optimizing for AI Overviews (AEO)
Search engines are evolving. Google’s AI Overviews and other Answer Engines parse content looking for semantic clarity. When building dynamic blocks for your blog, ensure the HTML output by your render_callback is highly semantic.
Instead of outputting <div> tags endlessly, use <article>, <aside>, and native list items. If your block generates an FAQ, ensure your PHP outputs proper Schema.org JSON-LD data. Because you have full control over the PHP output, injecting dynamic schema based on block attributes is incredibly easy much easier than wrangling React states.
Designing for Web Content Accessibility Guidelines (WCAG 2.2)
Accessibility isn't optional. Under WCAG 2.2, your website must be navigable, readable, and functional for all users, including those using assistive technologies. PHP-only blocks give you total control over the server-side HTML, making compliance straightforward.
When coding your render_callback, ensure you implement the following standards:
1. Meaningful Focus States
If your block generates interactive elements (like a dynamic CTA button), ensure the CSS attached to the block explicitly defines clear :focus and :focus-visible styles.
CSS
.ws55-block-button:focus-visible {
    outline: 3px solid #005fcc;
    outline-offset: 2px;
}
2. ARIA Labels and Roles
If your block relies on visual cues (e.g., an icon toggle), explicitly add aria-label or aria-hidden attributes in your PHP. Because you are simply concatenating strings in PHP, it is effortless to conditionally apply accessibility tags based on the attributes passed from the editor.
3. Color Contrast Compliance
When enabling color supports, users might select poor contrast ratios (e.g., light gray text on a white background). While you cannot prevent the user from making a poor design choice in the editor, you can use PHP to calculate the relative luminance of the chosen background and conditionally force a readable text color fallback if the contrast ratio drops below WCAG AA standards (4.5:1).
Conclusion
WordPress 7.0’s PHP-only block registration is a breath of fresh air. It respects the massive ecosystem of backend developers who built WordPress into the powerhouse it is today. By understanding the core mechanics of the autoRegister flag, mastering attribute types, and gracefully handling the render_callback, you can rapidly deploy custom, high-performance blocks without touching a single line of React.
It bridges the gap between classic server-side architecture and the modern block editor, allowing us to build faster, smarter, and cleaner web experiences.
What will be the first block you migrate to the new PHP-only architecture? Have you encountered any unique use cases or clever ways to handle dynamic data using this new feature? Drop your thoughts, questions, and code snippets in the comments below, and don't forget to share this guide with your fellow developers!